For many years, we’ve been telling ourselves we need to have more prints on our walls (especially since we’re photographers)! This past Christmas we gifted ourselves a photo wall! We did the research, and after many steps, we finally completed it, and we couldn’t be happier!!
If you’ve been thinking of doing the same thing, we’ll save you some trouble and guide you through the steps we took to create this photo wall.
Total cost: $400
Step 1: Plan your layout. We were fortunate enough to have an app we used with previous clients to help with the layout & hanging of their canvases.
If you want to use something free, try WallApp (desktop only).
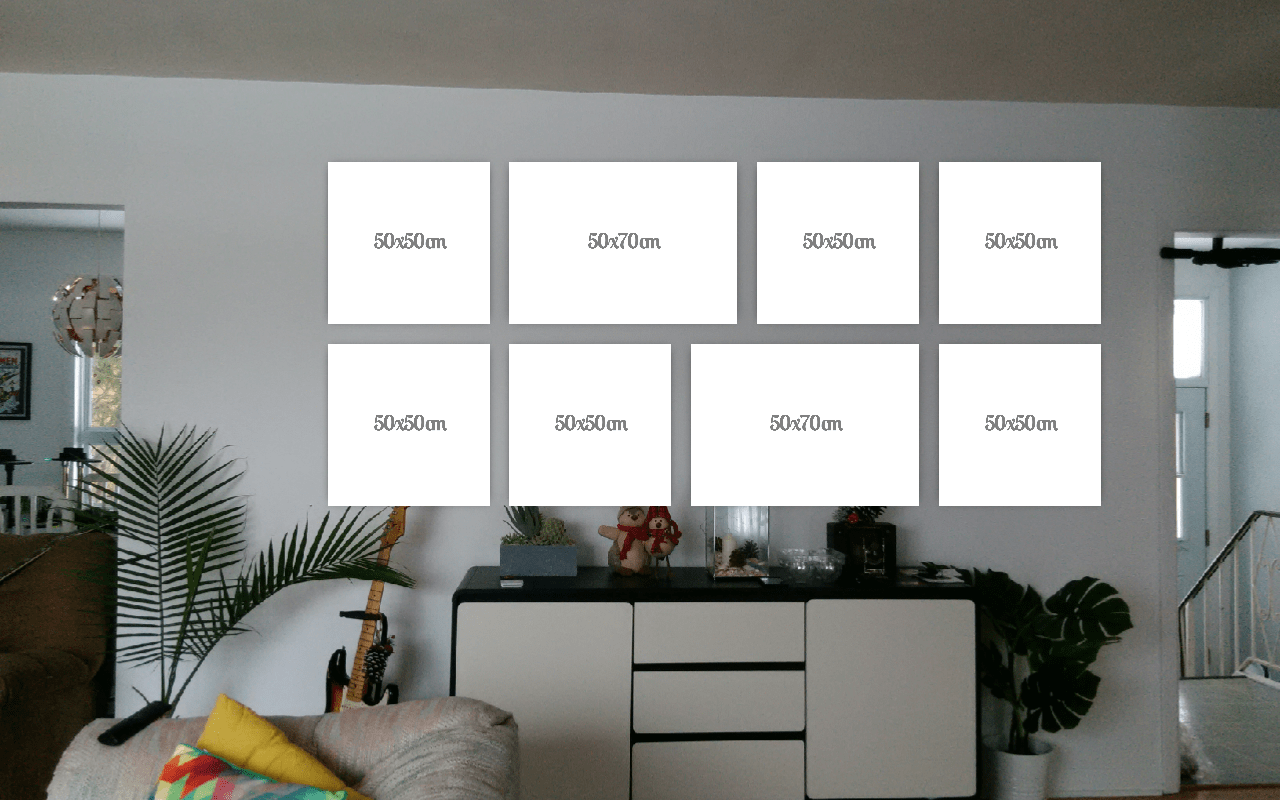
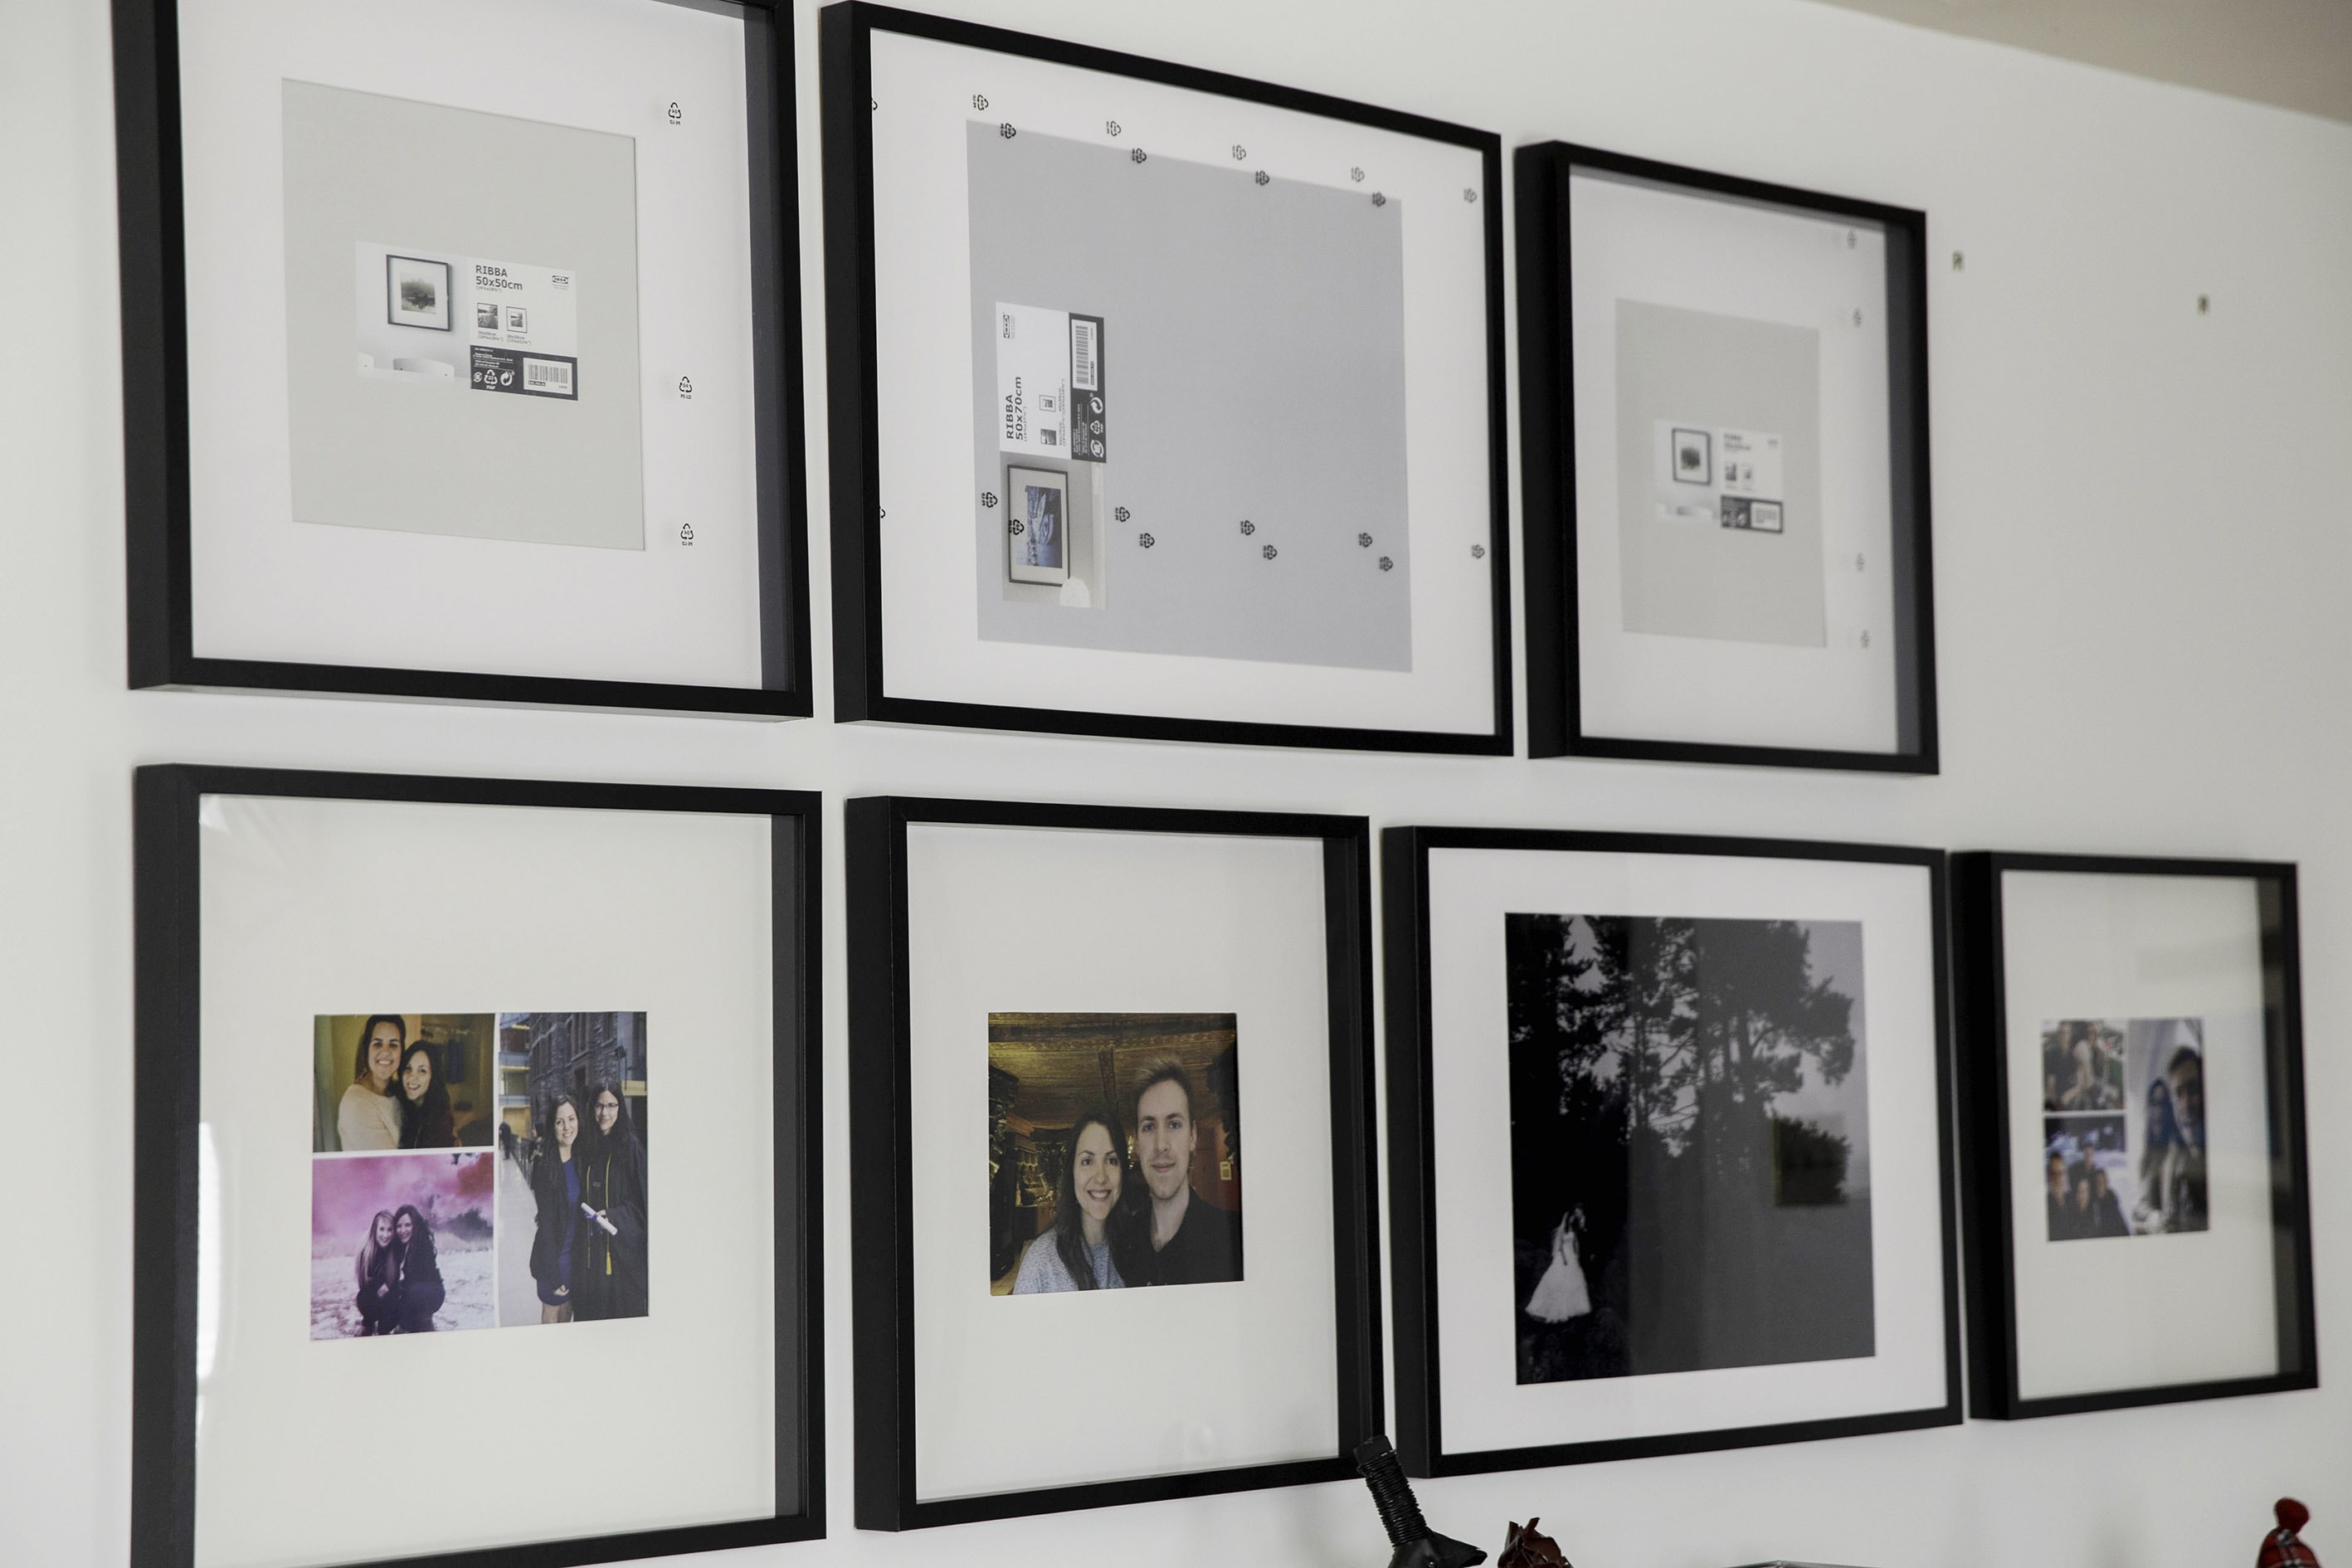
Step 2: Buy your frames. Since we were going to have a lot of big frames in this photo wall, we wanted to find the most affordable option. When you get into custom framing, your photo wall can cost you upwards of $1,000. So, in case you haven’t guessed it already, we got our frames from Ikea! Since we realized Ikea was going to be the most affordable option, we altered our photo wall in the app based on the Ikea frame sizes (which are super weird). This helped reassure us that the frame sizes were going to work in this area of the house.
Links to the frames:
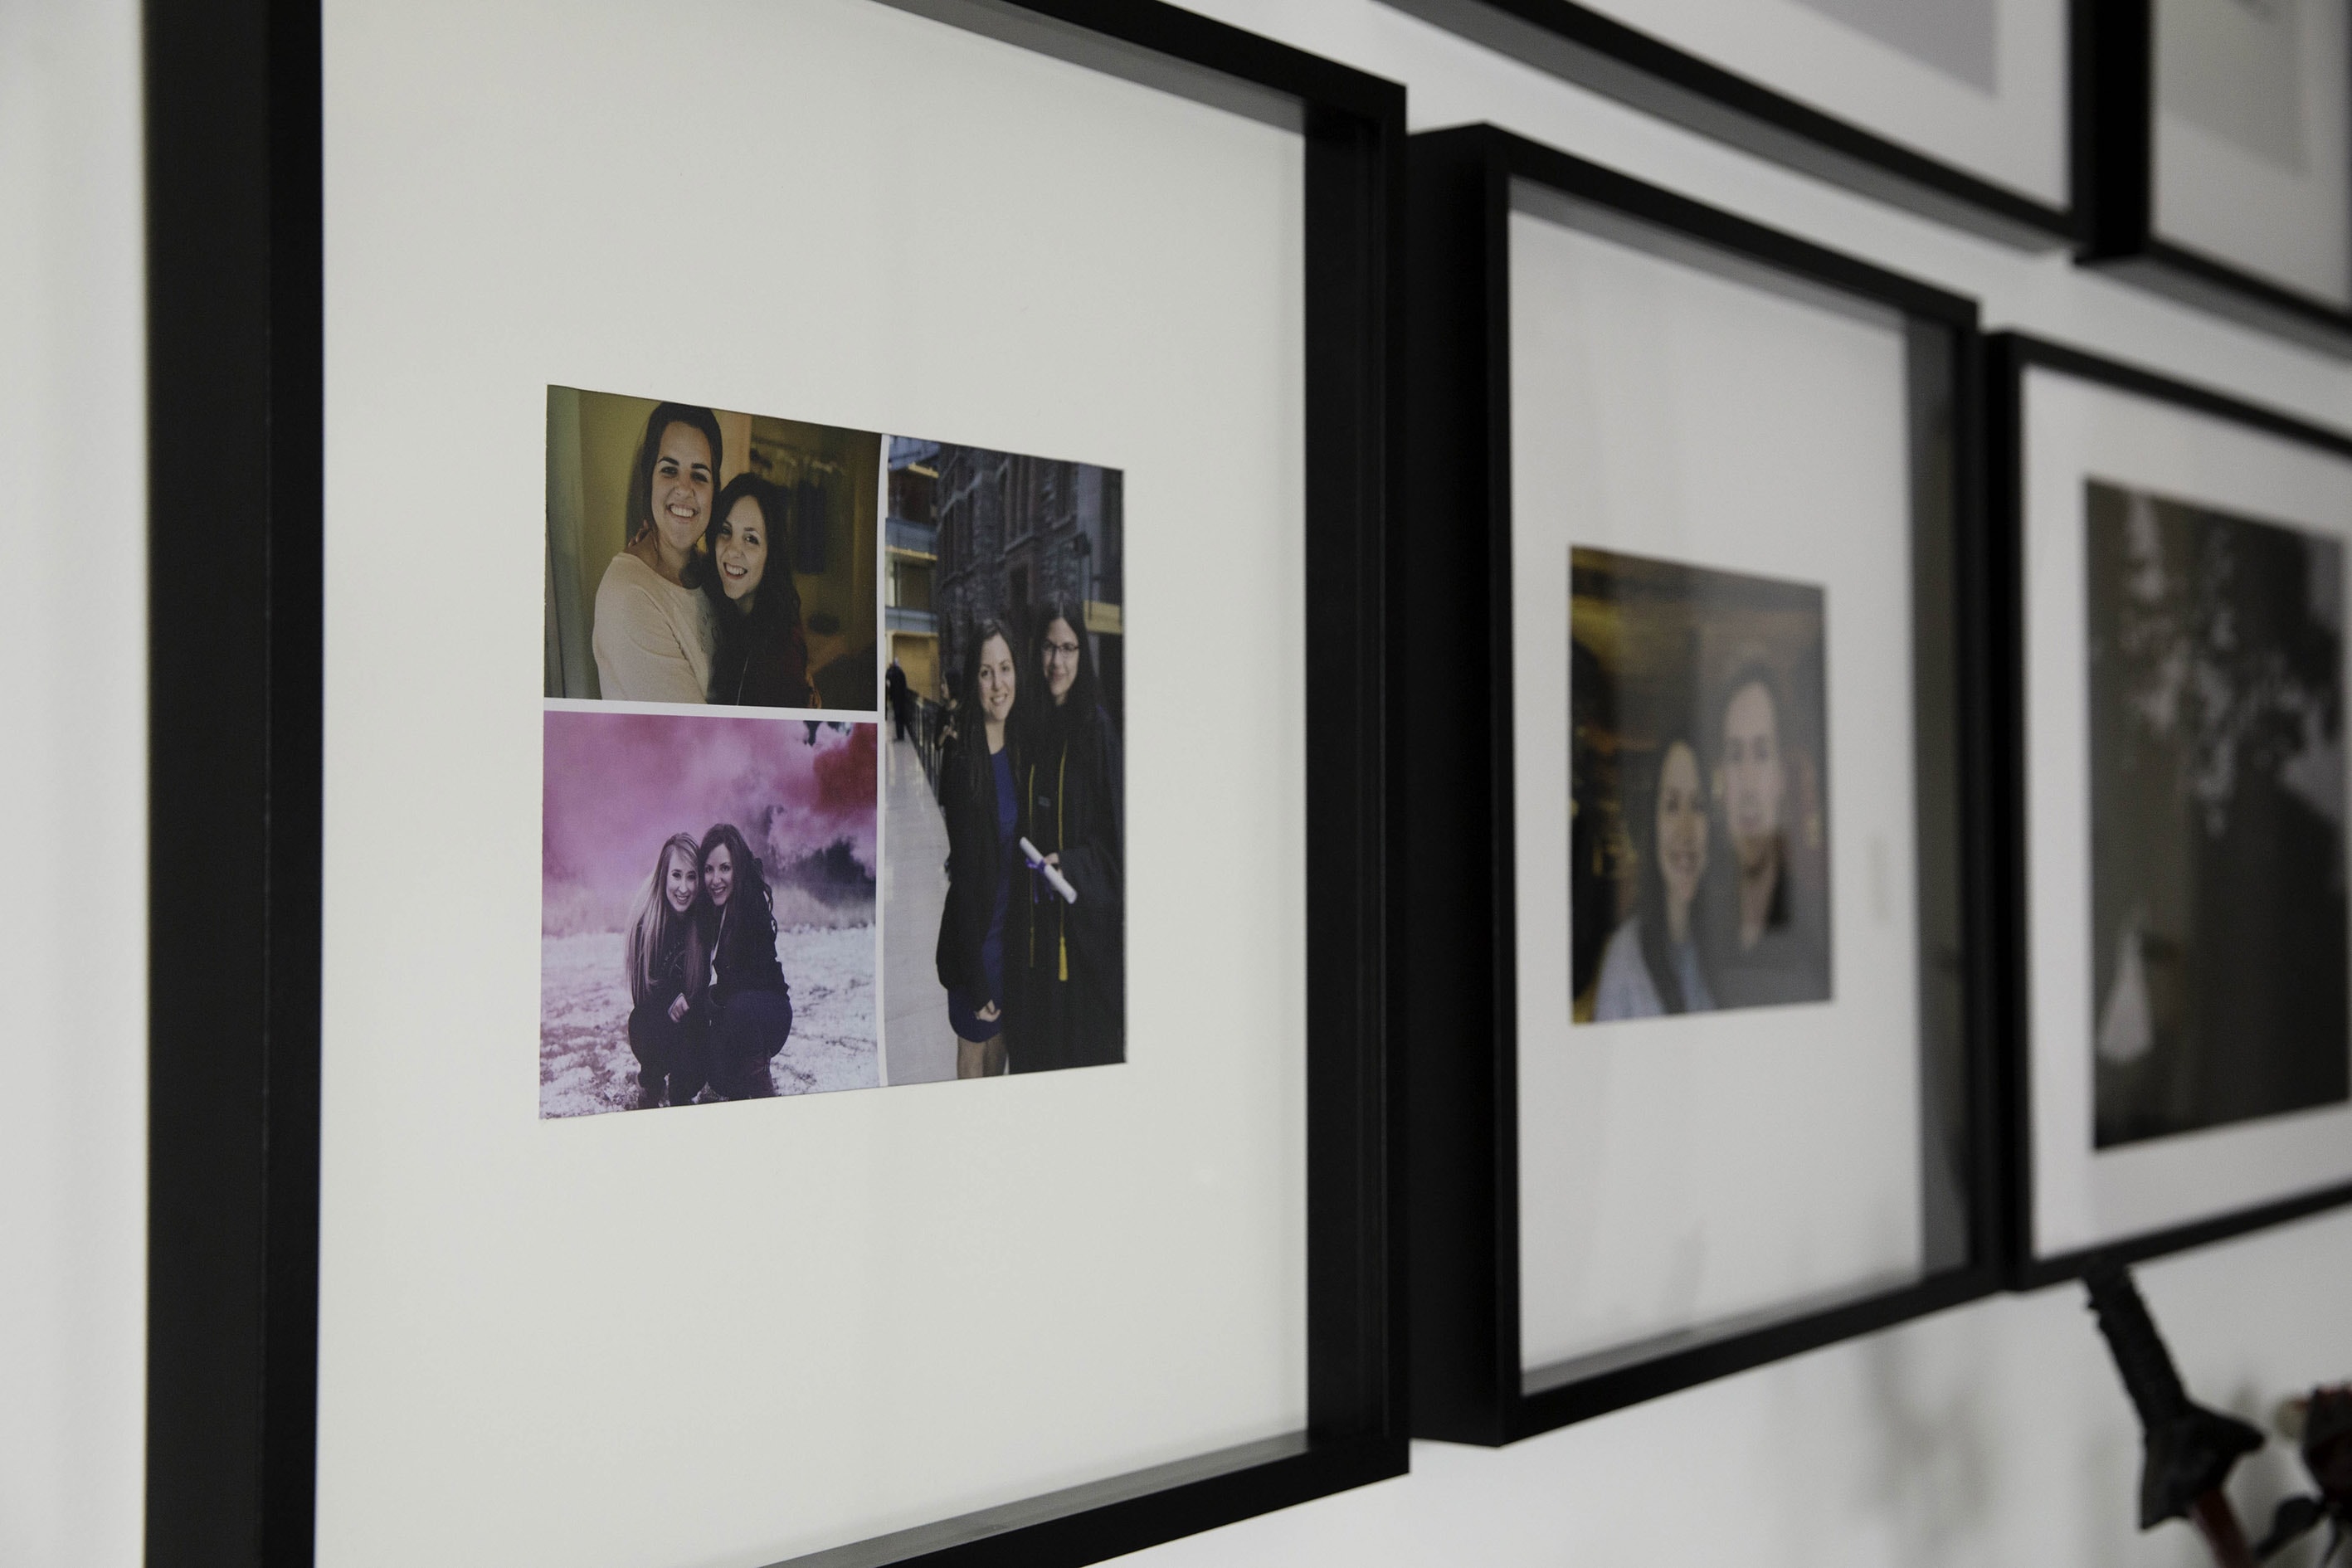
Step 3: Pick your photos. We used Google Drive so Chris and I could both add photos to our folder and have it sync. We then came together and deleted our least favorite ones. This part of the process took WAY too long. It’s already difficult to narrow down client’s photos; trying to narrow down our own photos..that’s a whole other ballgame. To help with the selection process, we used Photoshop to see which photos would look good together on the wall. Whichever photos didn’t work, we deleted. If you don’t have photoshop, Canva works great too!
Step 4: Order your prints! We ordered them in Fuji Pearl from GTA Imaging (located in Toronto). We’ve always been so happy with the colors and quality of their prints.
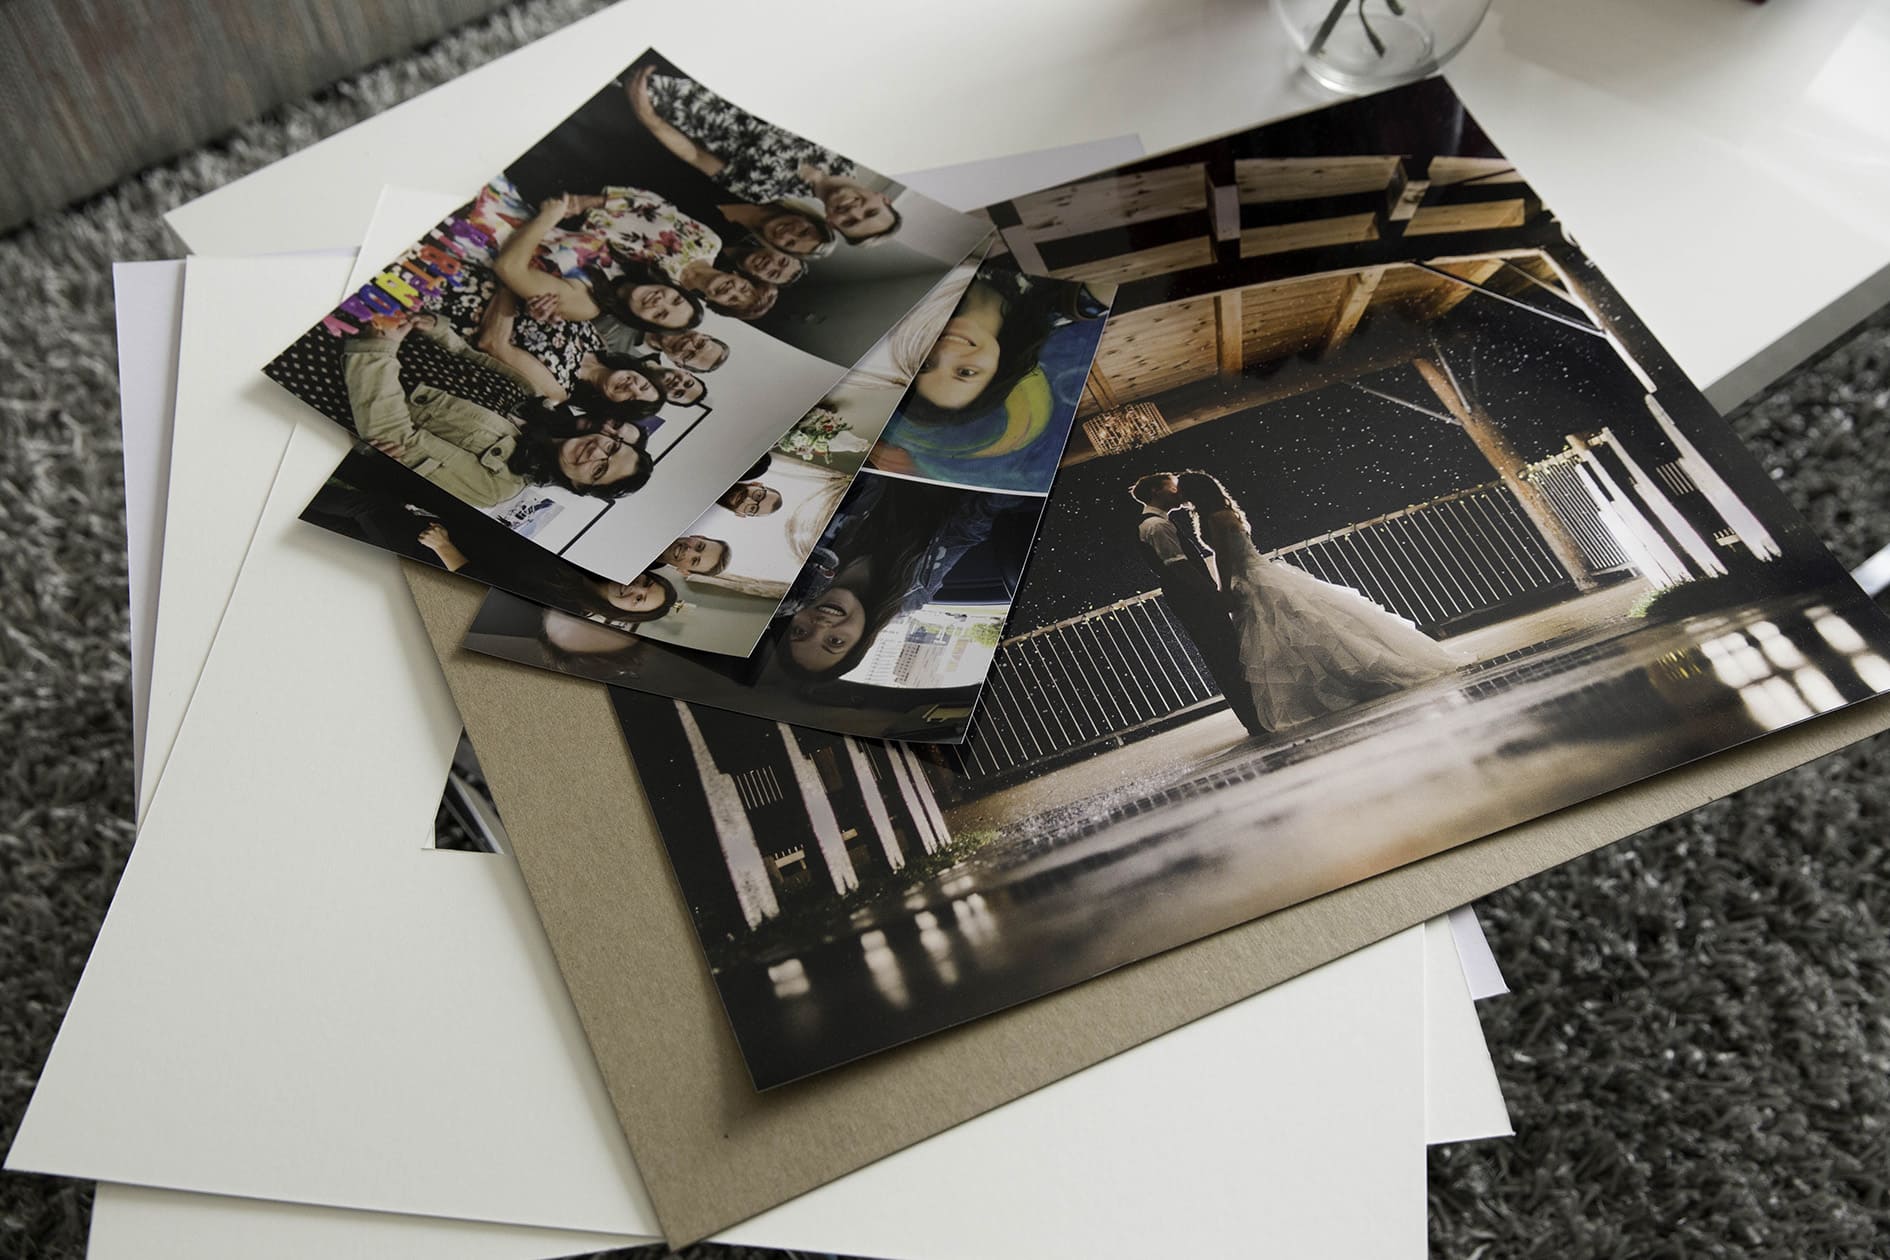
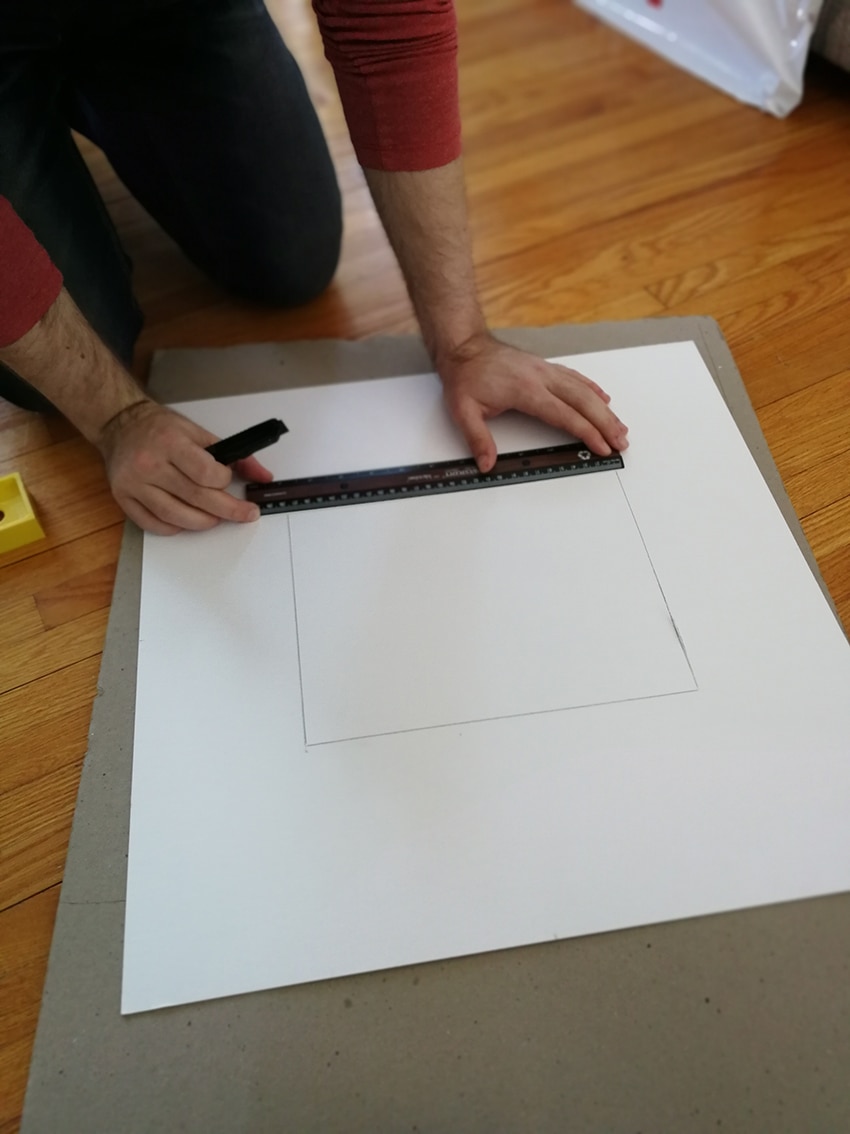
Step 5: Custom mats. This part is optional. Since we’re super picky… we wanted to create custom mats for the 50×50 frames so that our photos wouldn’t be oddly cropped (otherwise some photos wouldn’t have worked – people would have been cropped out). This was the most time-consuming/most annoying part! We took tons of time calling places and finding out pricing for custom mats. Everywhere we looked, they cost $30-$50 each! After much research, we decided to get crafty and make them ourselves. We found huge mat boards at DeSerres which only cost us $22 total!
Step 6: Insert your prints (and new mats) in the frames. We have a love-hate relationship with Ikea frames. As affordable as they are, they are also the most difficult to work with. We recommend using a knife to bend the metal clips, so you can take the back off without hurting your fingers (plus it’s just way quicker).
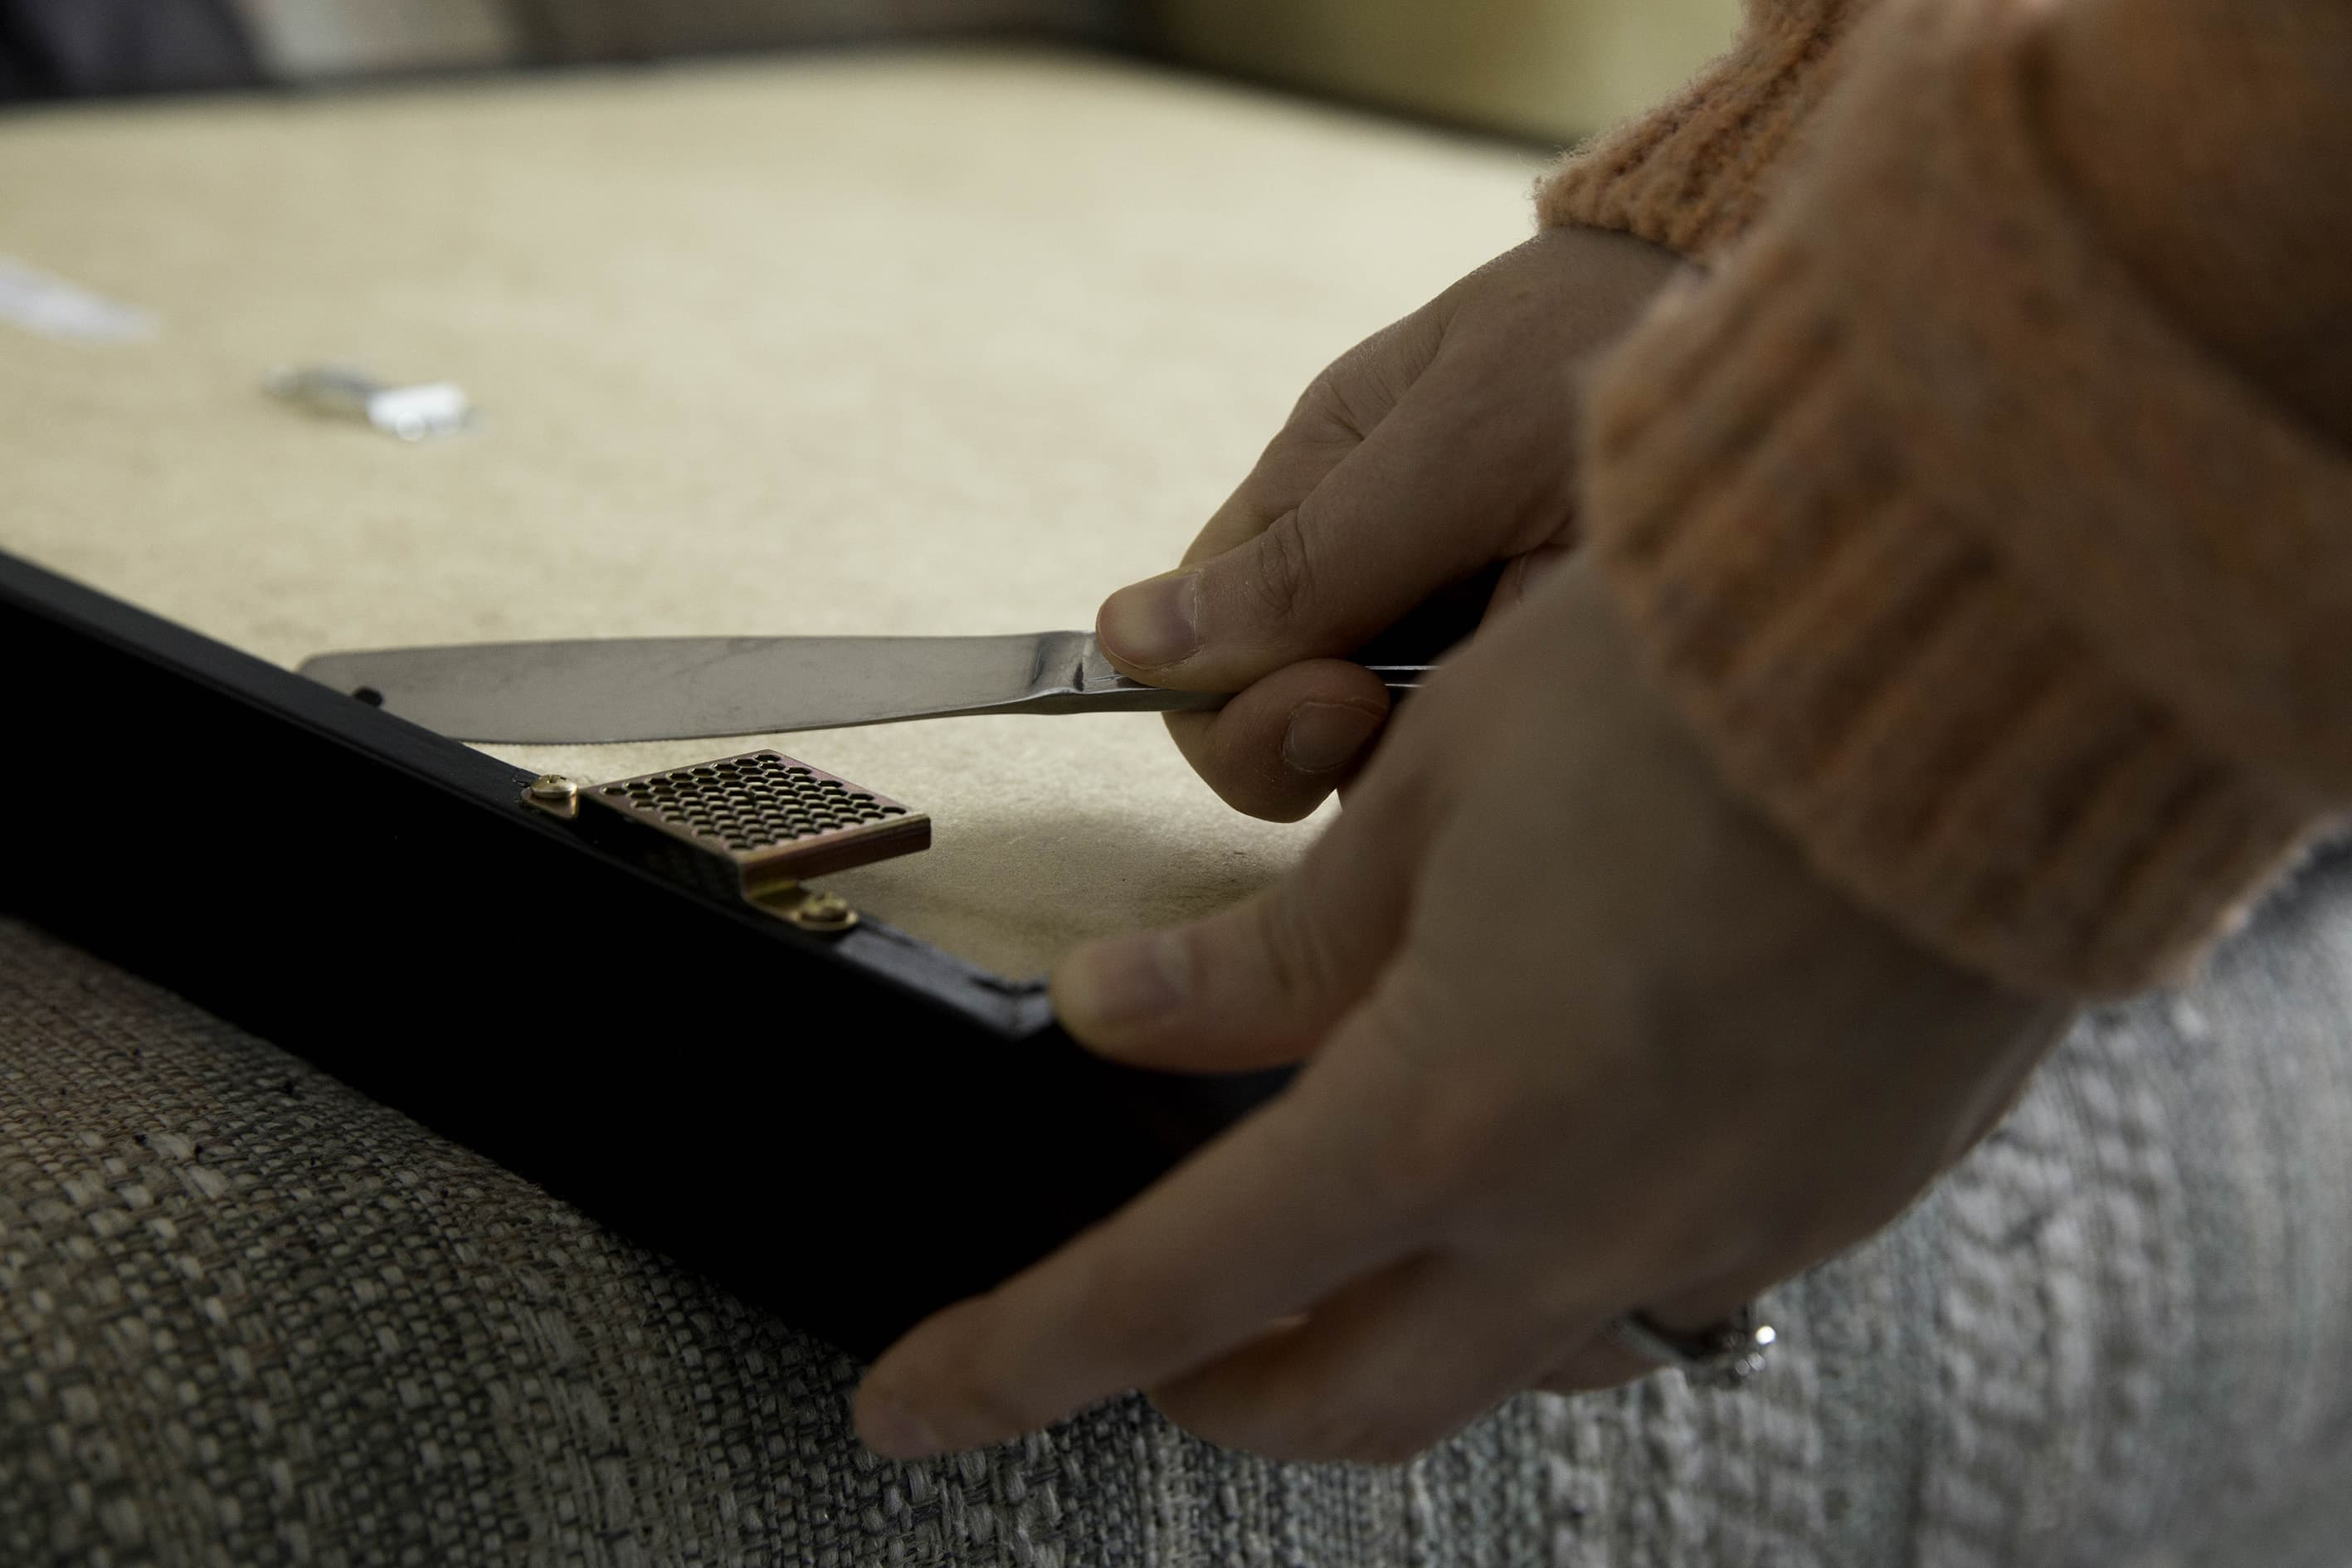
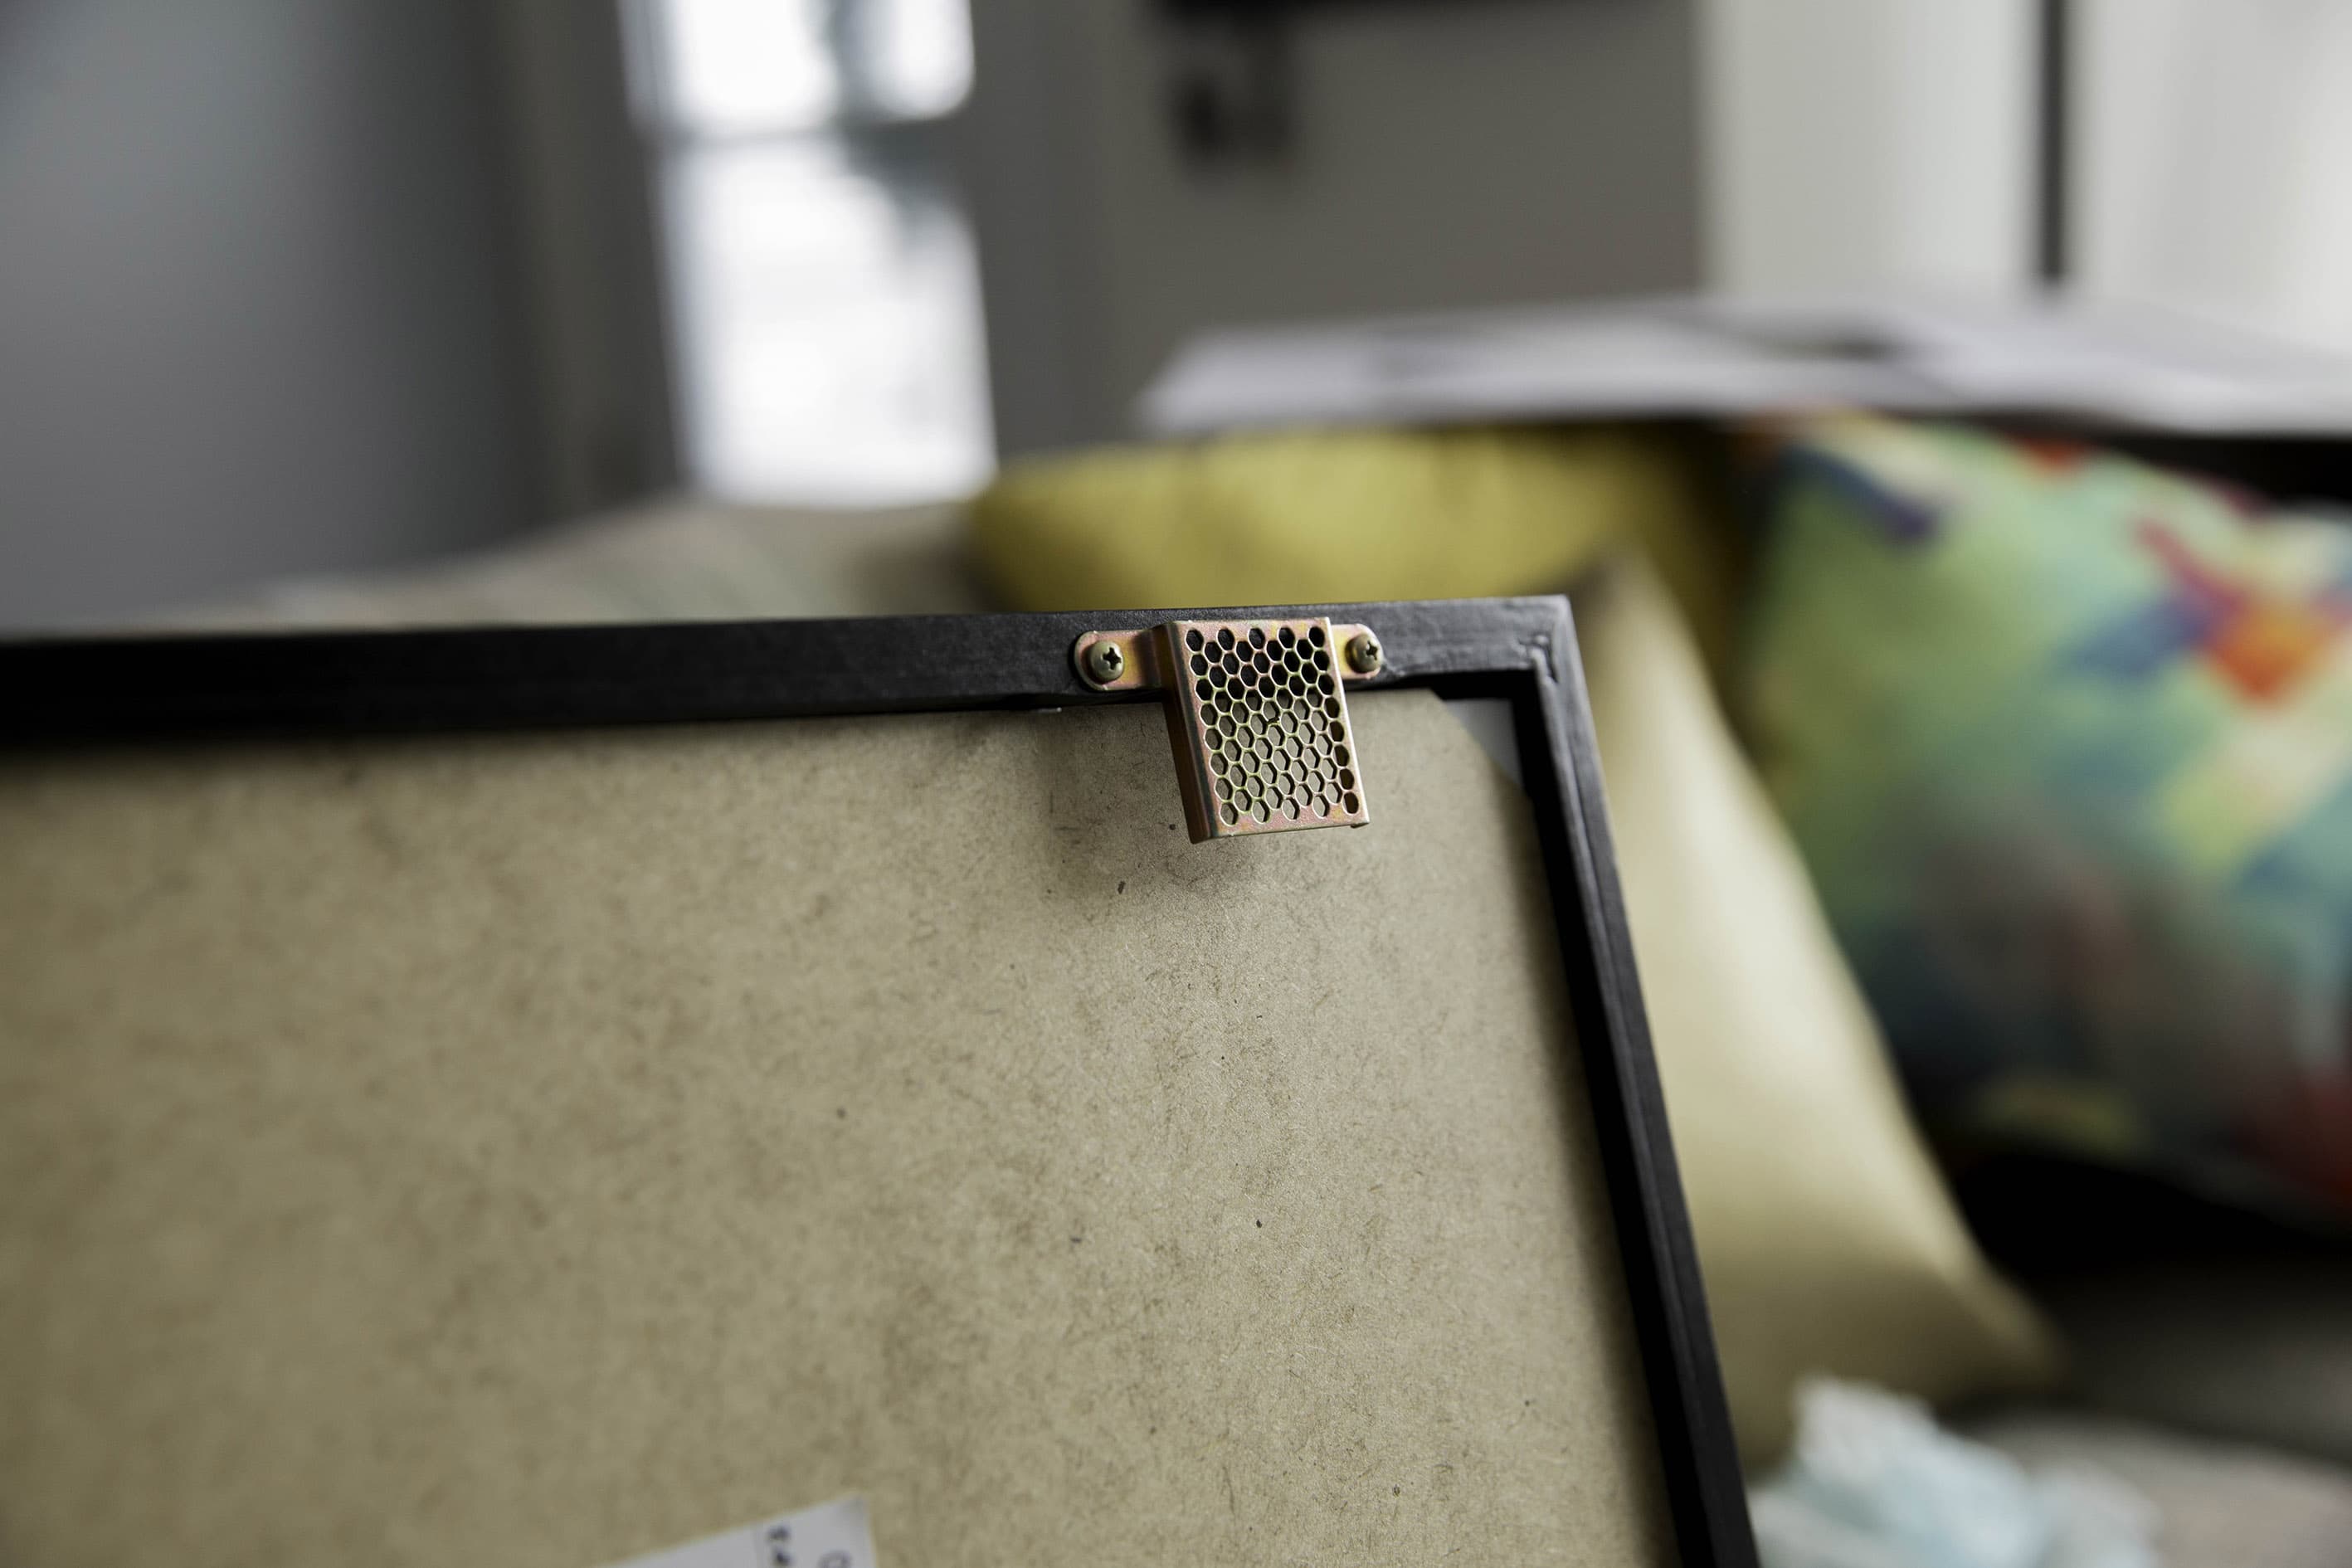
Step 7: Use Beehive Picture Hangers!! They have been a HUGE lifesaver for us so many times in the last few years! We couldn’t recommend these guys more!!
These will probably save your marriage from the anger that comes with hanging frames lol!
We screwed 2 of them into the back of each Ikea frame (do be careful when doing this, since the frame is made of fiberboard).
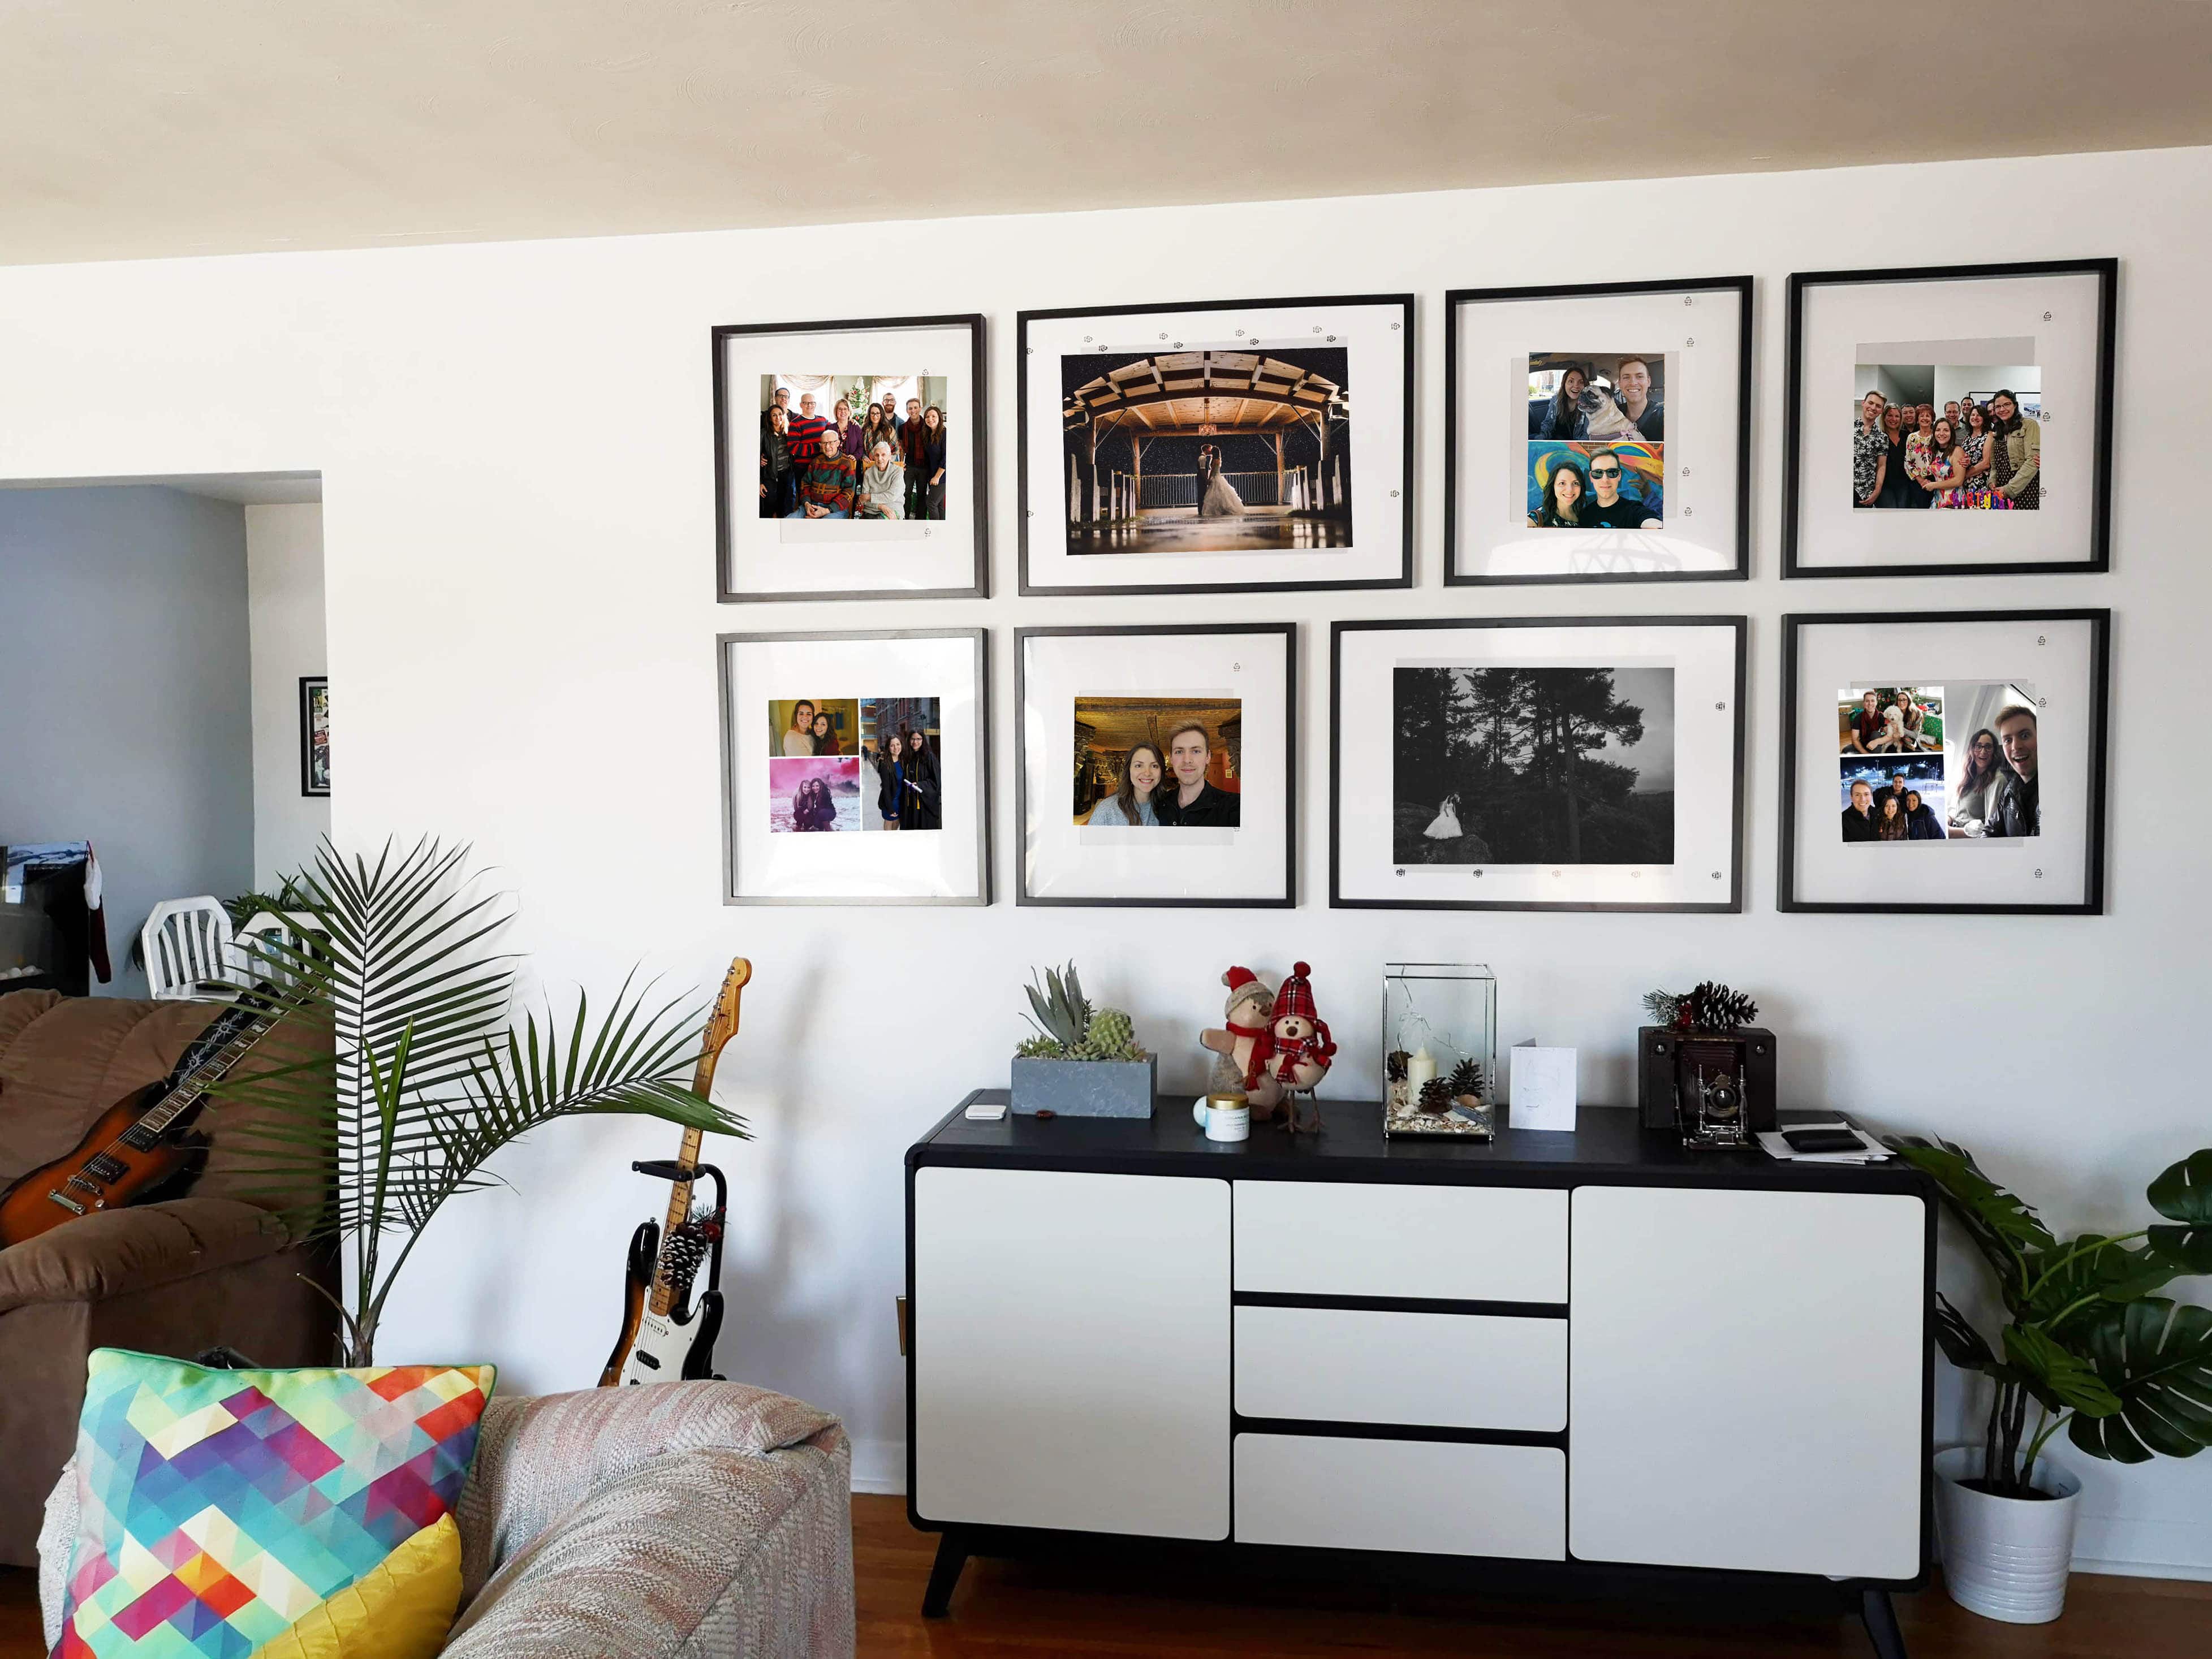
Step 8: Hang your frames! YAY!!
This is where the Beehive Picture Hangers come in handy & makes the whole process 100 times easier. All you do is sit a level on top of the frame, position the frame where you want it on the wall and simply press the frame into the wall so that the Beehive picture hangers make two little marks (this is where the nails are to be hammered). You just keep repeating this until all frames are up! We did need to measure the distance between each frame before pressing the frame to mark the holes to make sure it was unified.
Step 9: ENJOY YOUR MEMORIES!!
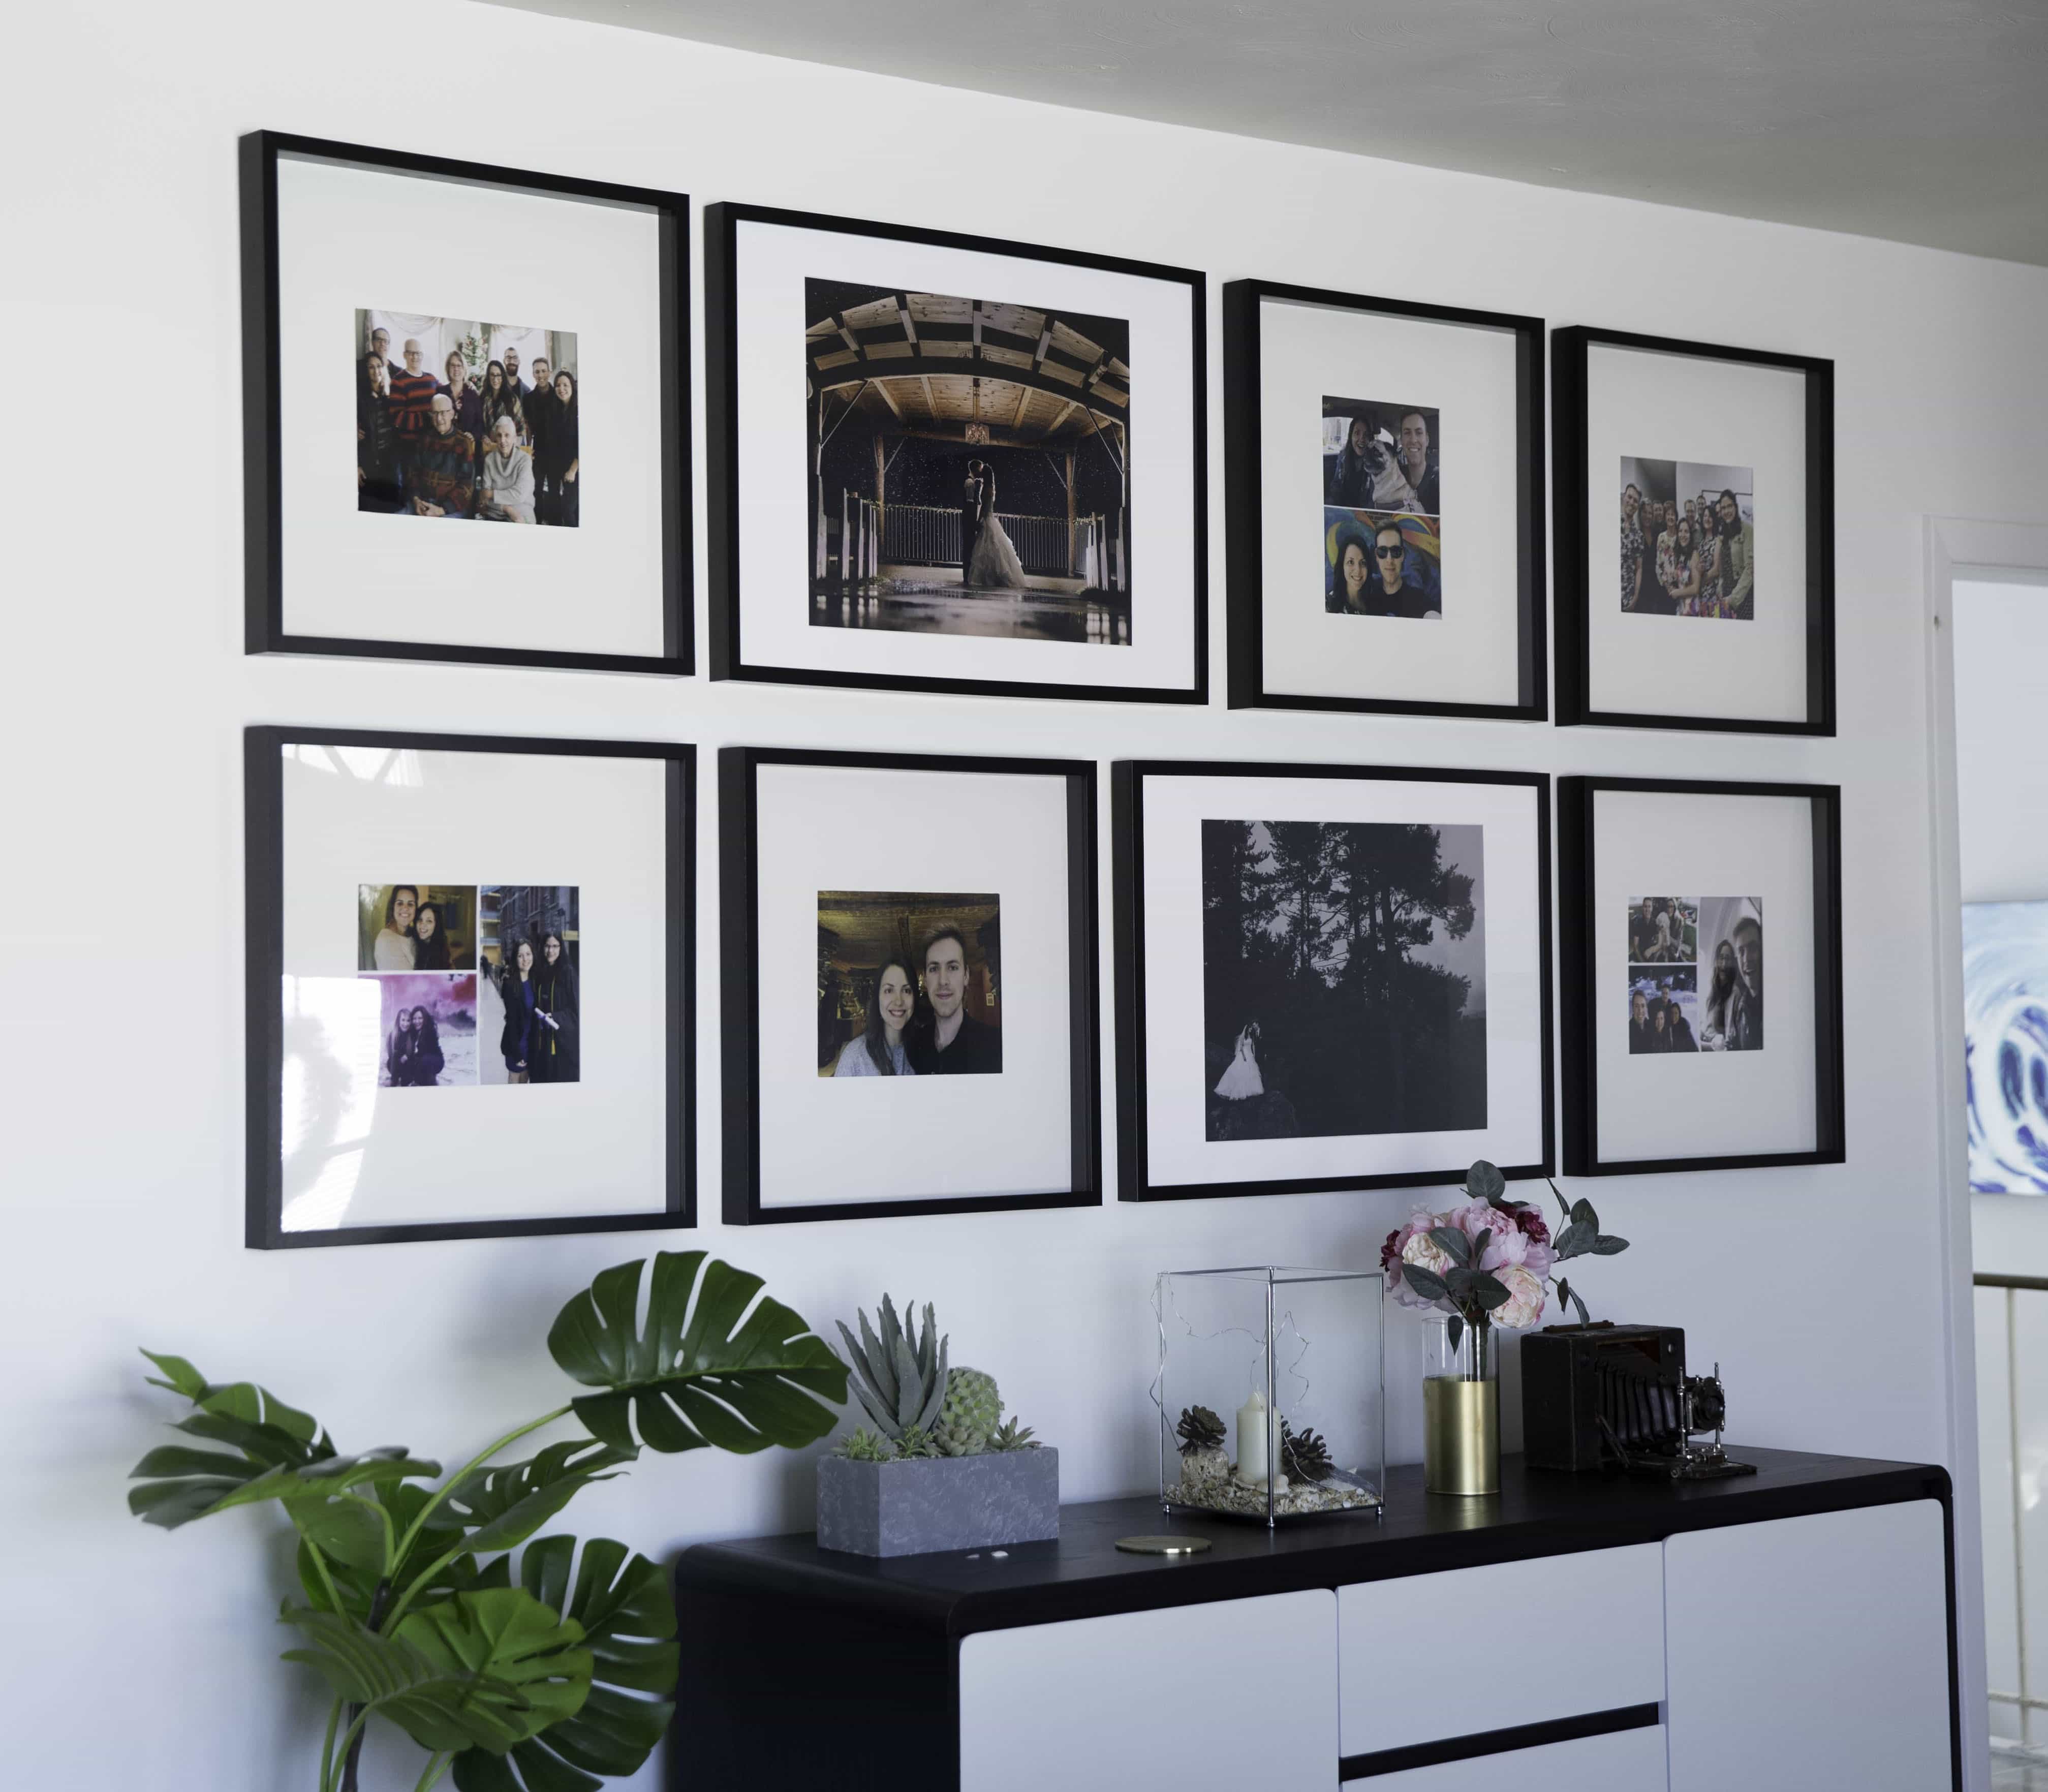
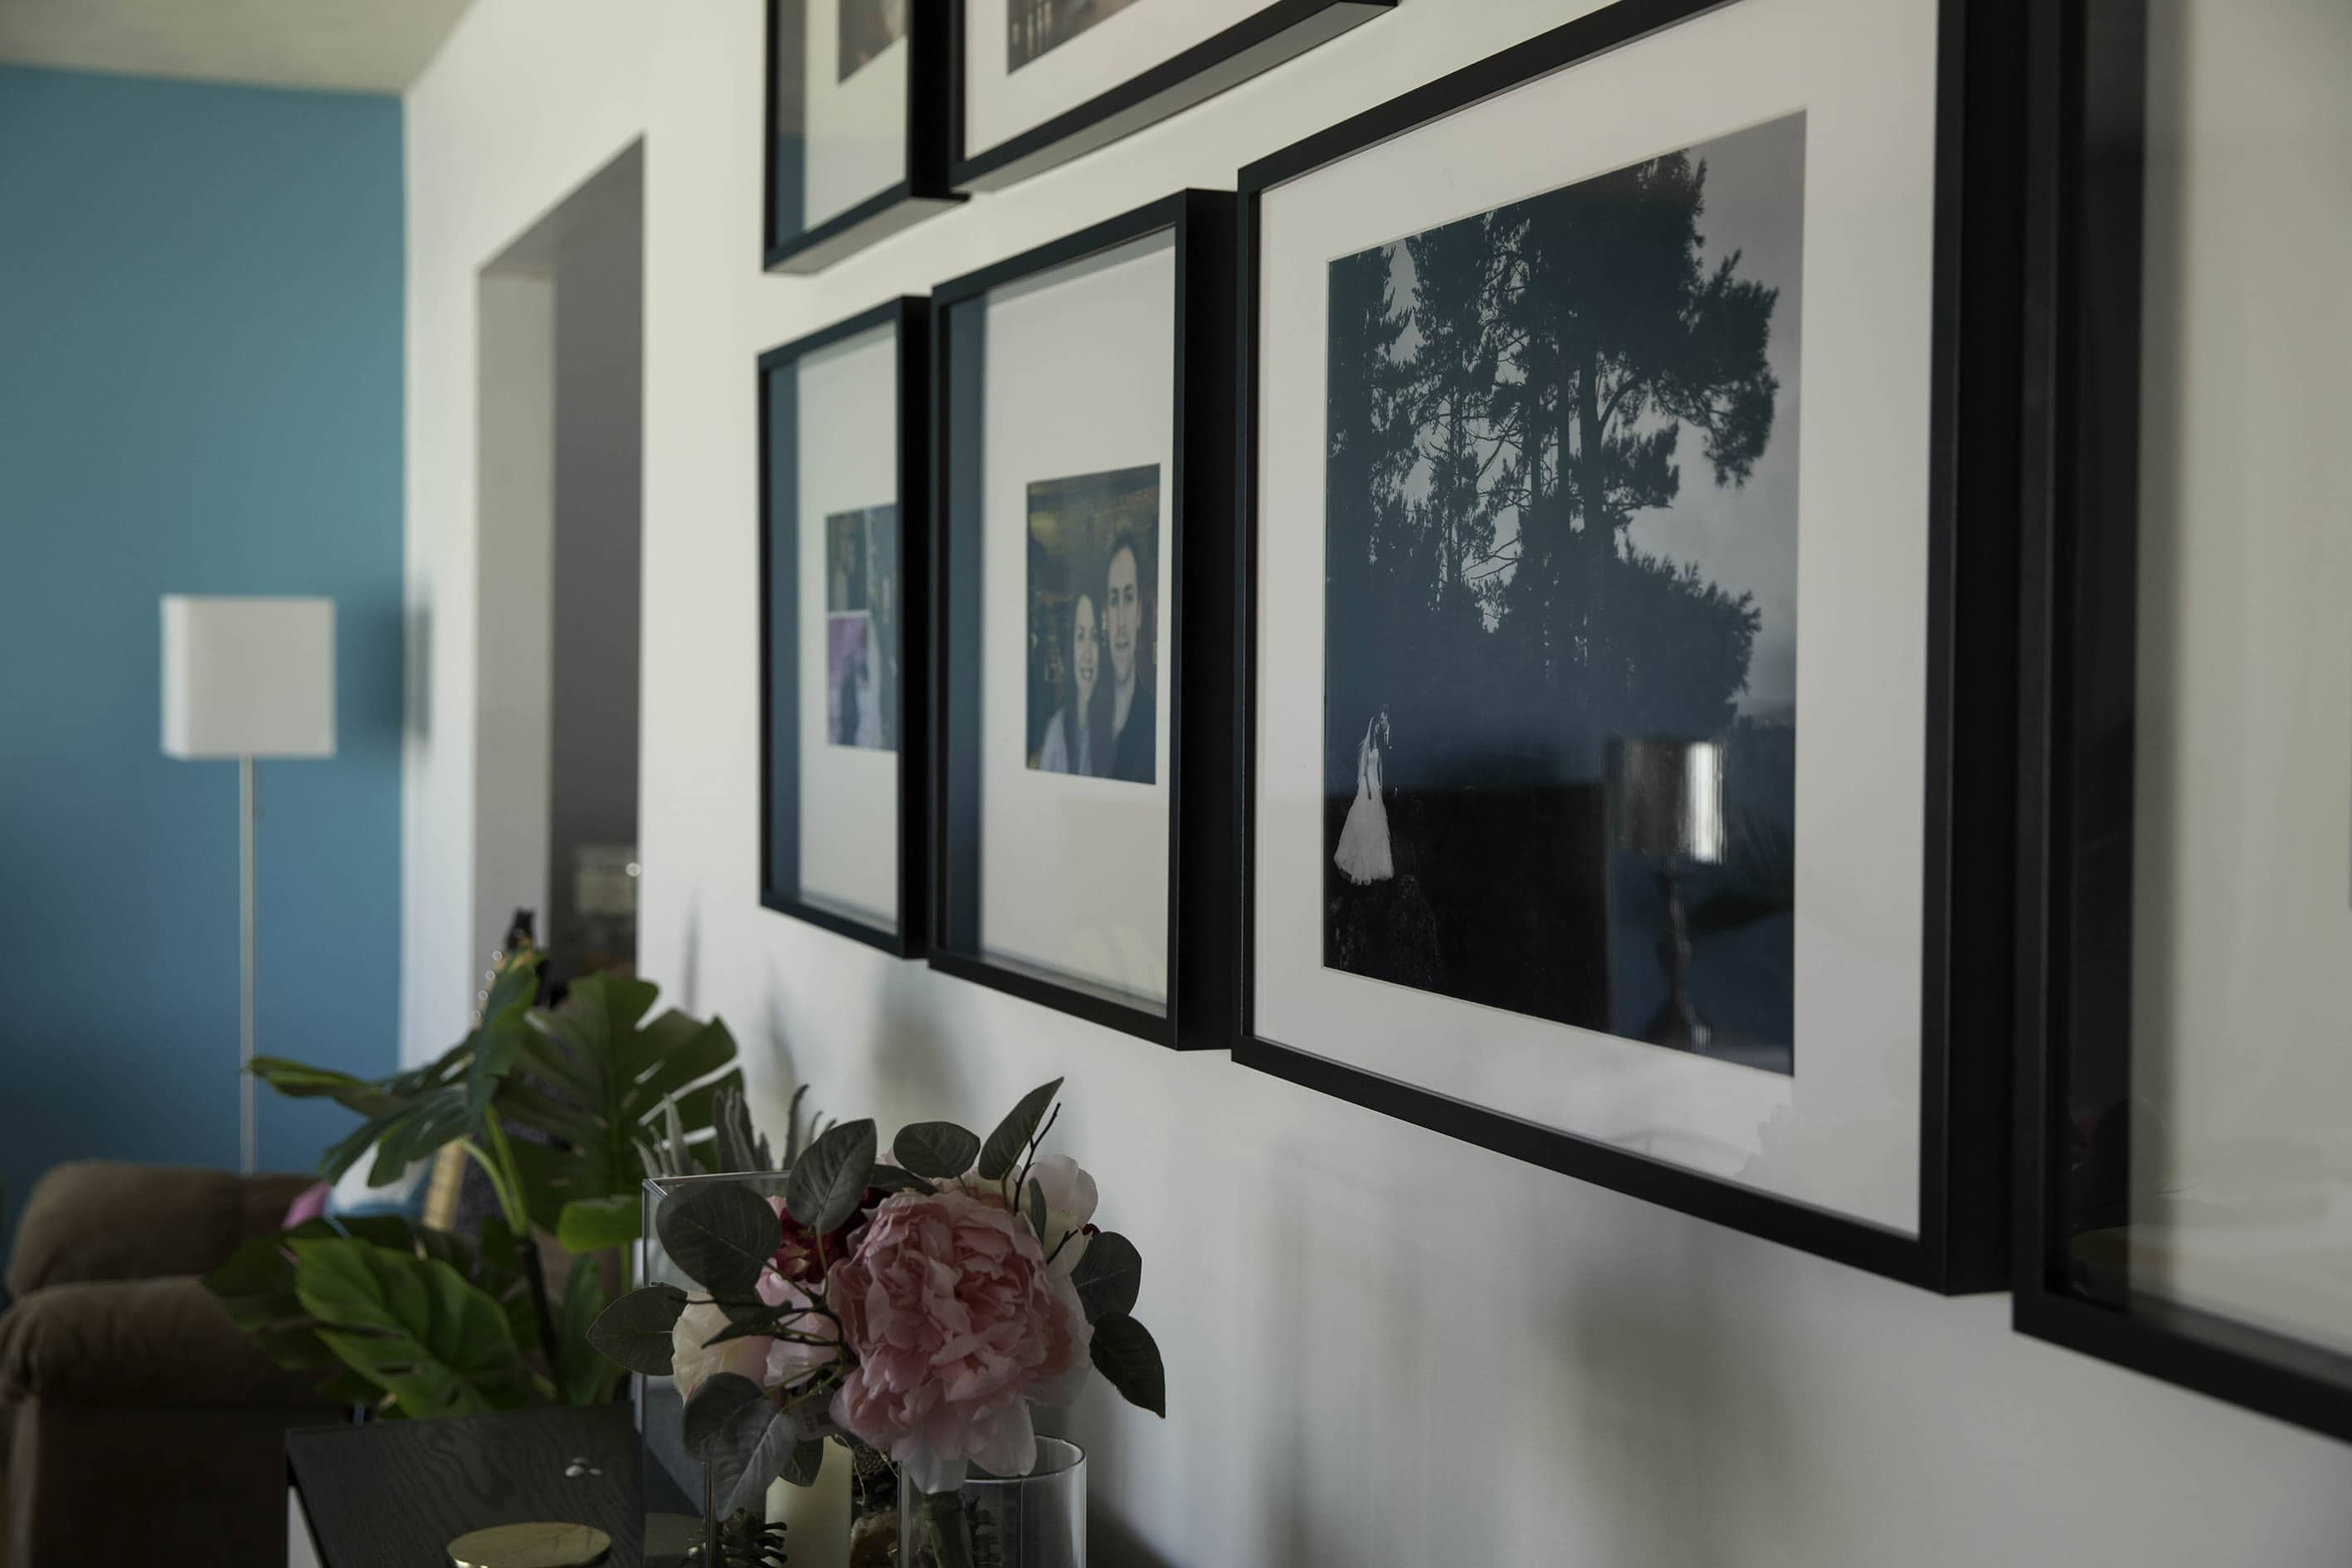
Overall, we were really happy with the final look! Again, another downside with using the Ikea frames is they have crazy reflections depending on where you stand. But hey, you get what you pay for!